5. 310°F / 154°C: Maillard Reactions Become Noticeable
The Maillard reaction turns foods brown and generates
mostly pleasant volatile aromatic compounds. You can thank Maillard reactions for the nice
golden-brown color and rich aromas of a Thanksgiving turkey, Fourth of July hamburger, and
Sunday brunch bacon. If you’re still not able to conjure up the tastes brought about by
Maillard reactions, take two slices of white bread and toast them—one until just before it
begins to turn brown, the second until it has a golden-brown color—and taste the
difference.
The nutty, toasted, complex flavors generated by the Maillard reaction are created by
the hundreds of compounds formed when amino acids and certain types of sugars combine and
then break down. Named after the French chemist Louis Camille Maillard, who first
described it in the 1910s, the Maillard reaction is specifically a reaction between amino
acids (from proteins) and reducing sugars, which are sugars that form aldehydes or
ketone-based organic compounds in an alkaline solution (which allows them to react with
the amines). Glucose, the primary sugar in muscle tissue, is a reducing sugar; sucrose
(common table sugar) is not.
Maillard reactions aren’t solely dependent on temperature. Besides temperature, there
are a number of other variables that affect the reaction rate. More alkaline foods undergo
Maillard reactions more easily. Egg whites, for example, can undergo Maillard reactions at
the lower temperatures and higher pressure found in a pressure cooker. The amount of water
and the types and availability of reactants in the food also determine the rate at which
Maillard reactions will occur. It’s even possible for Maillard reactions to happen at room
temperature, given sufficient time and reagents: self-tanning products work via the same
chemical reaction!
All things considered, though, in culinary applications—cooking at moderately hot
temperatures for short periods of time—the 310°F / 154°C temperature given here serves as
a good marker of when Maillard reactions begin to occur at a noticeable rate, whether
you’re looking through your oven door or sautéing on the stovetop.
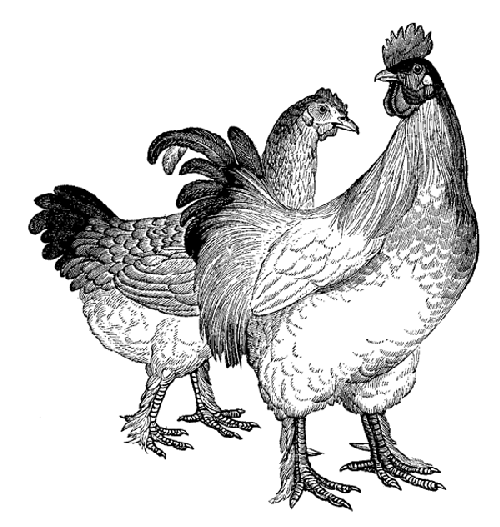
Butterflied Chicken, Broiled and Roasted
You might be the type who prefers
to let the butcher do the butchering, but it’s worth learning how to butterfly a
chicken (this is also known as spatchcocking), even if you’re
squeamish about raw meat. A butterflied chicken is easy to cook, and the crispy brown
skin of a well-cooked chicken has a very satisfying flavor from the Maillard
reactions. It’s economical, too, yielding four to six meals for not much money and a
few minutes of surgery.
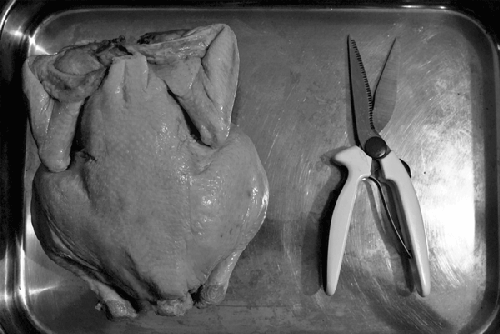
A chicken that’s been cleaned and gutted is topologically a cylinder. It’s
basically a big, round piece of skin and fat (outer layer), meat (middle layer), and
bone (inner layer). Cooking a whole bird intact is harder than a butterflied bird,
because invariably that cylinder is going to get heated from different directions at
different rates. That is, unless you have a rotisserie grill, which heats the outside
uniformly, cooks it uniformly, and makes it uniformly yummy.
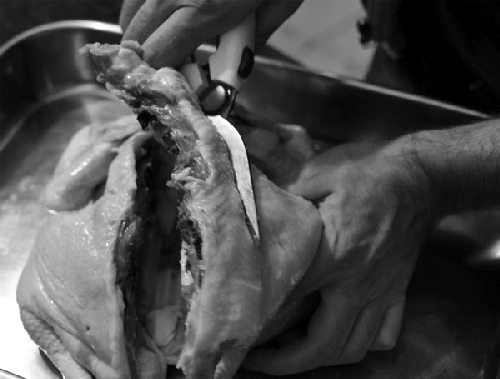
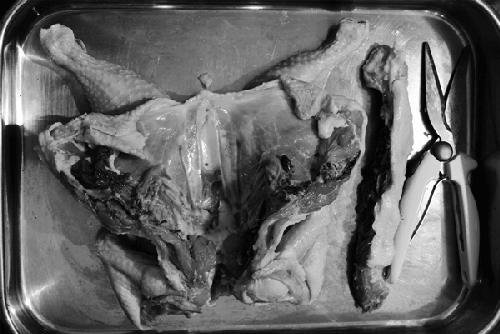
By snipping the spine out of the chicken, you transform that cylinder into
a plane of chicken—skin on top, meat in the middle, bone on the bottom. And the
topology of such a surface is well suited to heat coming from a single direction
(i.e., broiling), meaning it’s much easier to cook to develop a
nice, brown, crispy skin.
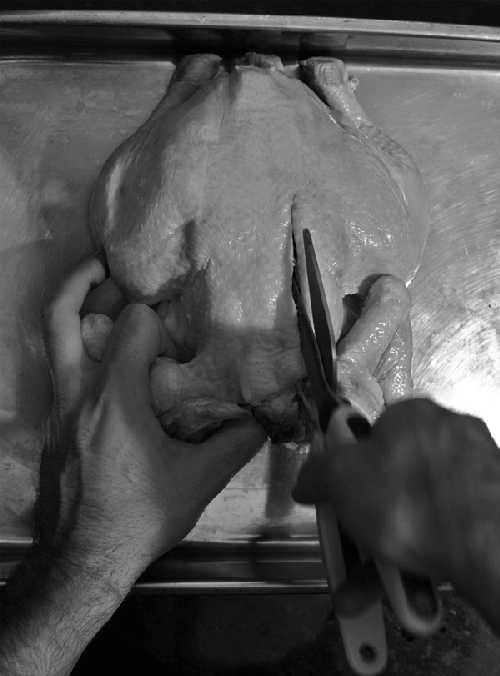
Once the spine is removed (trash it, or save it in the freezer for making
stock), flip the bird over, skin side up, and using both hands—left hand on left
breast, right hand on right breast—press down to break the sternum so that the
chicken lies flat. Formally speaking, you should remove the keel bone as well, but
it’s not necessary. (The keel bone is what connects the two halves of the
butterflied chicken together.)
Now that you have a butterflied
chicken, cooking it is straightforward. Because the skin is on one side and the bone on
the other, you can use two different heat sources to cook the two sides to their correct
level of doneness. That is, you can effectively cook the skin side until it’s brown from
Maillard reactions, and then flip the bird over and finish cooking until a probe
thermometer or manual inspection indicates that it is done.
Rub the outside of the butterflied chicken with olive oil and sprinkle it with salt.
(The oil will prevent the skin from drying out while cooking.) Place the bird on top of
a wire roasting tray in a roasting pan, skin side up. (The wire tray raises the bird up
off the pan so that it doesn’t stew in the drippings that come out.) Tuck the wings up,
over and under the breasts so that they’re not exposed to the broiler.
Broil at medium heat for about 10 minutes, or until the skin develops a nice level
of brownness. Keep a good 6″ / 15 cm between the bird and the heating element of your
oven. If your broiler is particularly strong and parts of it begin to burn, you can
create a “mini-heat shield” with aluminum foil.
Once the skin side has browned, flip the bird over (I use folded-over paper towels
instead of tongs to avoid tearing the skin). Switch the oven to bake mode, at around
350°F / 177°C. Ideally, use a probe thermometer set to beep at 160°F / 71°C (carryover
will take it up to 165°F / 74°C). If you don’t have a probe thermometer, check for
doneness after around 25 minutes by cutting off one leg and checking that the juices run
clear and the flesh looks cooked. If it’s not done, set the two halves back together and
return it to the oven, checking periodically.
Notes
Some people like to brine their chickens. At the very least, it adds
salt into the meat, changing the flavor. Try brining the chicken in a salt
solution for half an hour or so (½ cup / 150g salt, 2 liters ice water—but really,
you can just dump salt in water until it’s saturated). If you’re going to brine it
for longer than an hour or so—longer times yield saltier chicken—use cold water
(add ice!) and store it in the fridge to keep the chicken below 40°F / 4°C while
it brines.Alton Brown’s TV show Good Eats has an episode on
butterflying a chicken. He creates a garlic/ pepper/lemon zest paste to stuff
under the skin, and roasts the chicken above a bed of cellar veggies (carrots,
beets, potatoes). It’s a great recipe, as the paste brings a lot of flavor to the
bird and the cellar roots pick up the chicken drippings. For another variation,
try putting chopped garlic and aromatic herbs such as rosemary under the
skin.For further inspiration, look at Julia Child et al.’s
Mastering the Art of French Cooking, Volume 2 (Knopf), which has an
excellent description of Volaille Demi-Désossée—half-boned
chicken—starting on page 269. She removes the breastbone (leaving the spine
intact), stuffs the bird (foie gras, truffles, chicken
livers, and rice), sews it back up, and roasts it.